Have you ever found yourself wishing for a gym-quality workout without leaving the comfort of your home? Imagine having the freedom to exercise anytime, without the hassle of commuting or crowded spaces.
DIY home workout equipment can make that dream a reality, and it might be easier than you think to get started. By using simple materials and a dash of creativity, you can build effective fitness tools that cater to your personal workout needs.
Are you ready to discover how you can transform your living space into a personal gym haven? Let’s dive into the world of DIY home workout equipment and explore how you can boost your fitness routine with minimal expense and maximum fun.

Credit: www.pinterest.com
Benefits Of Diy Workout Equipment
Creating your own workout equipment has many benefits. It saves money, encourages creativity, and promotes sustainability. DIY equipment can be made from items you already have. This makes it affordable and environmentally friendly.
Cost-effective Solution
DIY workout gear is budget-friendly. You use materials already at home. This reduces the need to buy expensive equipment. Save money for other needs while staying fit.
Customizable To Your Needs
Create equipment that fits your workout style. Adjust weights and resistance levels easily. Make items that suit your strength and fitness goals. No need to compromise on pre-made equipment.
Encourages Creativity
Building your own gear sparks creativity. Discover new ways to use household items. Find unique solutions for exercise challenges. Personalize your workout space with custom creations.
Environmentally Friendly
DIY equipment is eco-friendly. Repurpose items instead of buying new ones. Reduce waste and contribute to a greener planet. Make sustainable choices that benefit the environment.
Space-saving Options
Crafting your equipment saves space. Design compact tools for small areas. Store items easily when not in use. Perfect for home gyms with limited room.
Sense Of Achievement
Feel accomplished when you make your own gear. Experience pride in your creations. Boost motivation for workouts. Crafting equipment adds satisfaction to your fitness journey.
Choosing The Right Materials
Creating DIY home workout equipment offers a flexible fitness routine. Choosing the right materials is crucial for effective and safe workouts. This ensures the longevity of your equipment and maximizes your investment. Different factors influence material choice. Considerations include durability, safety, cost-effectiveness, and accessibility. Let’s explore these aspects in detail.
Durability And Safety
Durability ensures your equipment withstands regular use. Choose robust materials like wood, metal, or high-quality plastic. These materials resist wear and tear effectively. Safety is equally important. Avoid sharp edges or unstable constructions. Smooth finishes and stable designs prevent injuries.
Cost-effectiveness
DIY projects save money on gym memberships. Consider affordable materials that fit your budget. Repurposed wood or recycled metal can be cost-effective. Compare prices of new and recycled materials. Balance quality with affordability for the best results.
Availability And Accessibility
Materials should be easy to find. Local hardware stores often stock essential items. Online platforms offer broader options, especially for specific needs. Choose materials that are readily available to avoid delays. Accessibility ensures you can start your project quickly.
Essential Diy Equipment Ideas
Creating your own workout equipment at home can be a game-changer for your fitness routine. With a little creativity, you can design effective tools without breaking the bank. You don’t need a fancy gym setup to get a good workout. Embrace the challenge and see how these essential DIY equipment ideas can transform your home workouts.
Homemade Dumbbells
Homemade dumbbells can be as simple as filling two water bottles or milk jugs with sand or water. Adjust the weight by adding or removing the contents. Another option is to use bags of rice or beans, which are usually found in your pantry.
Secure the bags with duct tape for extra grip. If you’ve ever struggled with traditional weights, these homemade options might surprise you with their versatility. Imagine lifting weights while saving money!
Resistance Bands Alternatives
Resistance bands offer flexibility in workouts, but DIY alternatives can work just as well. Try using old bicycle inner tubes or large rubber bands. They provide similar resistance for stretches and strength training.
If you have worn-out leggings or tights, tie them together to create a makeshift band. Get creative with what you have lying around. Ever thought about using a towel for resistance exercises? It’s possible!
Diy Kettlebells
Kettlebells are popular for building strength, but they can be pricey. Consider making your own with a sturdy bag filled with sand or rocks. Secure the top with strong tape to create a handle.
Another idea is to use a plastic jug filled with water or sand and reinforced with duct tape. This method can surprise you with its effectiveness. Who knew you could sculpt muscle with a jug from your kitchen?
Have you ever tried making your own workout gear? What unexpected household items have you turned into exercise tools? Your home can be a treasure trove of fitness resources waiting to be discovered. Give it a try and see how these ideas can fit into your routine.
Creating A Versatile Workout Bench
Crafting your own versatile workout bench can elevate home exercise routines. Using simple materials, build a sturdy bench that supports various exercises. Customize the design to fit space and needs, ensuring comfort and functionality for an effective workout experience.
Creating a versatile workout bench at home is rewarding. It offers flexibility for various exercises. You can customize it to suit your needs. This DIY project saves money and space. Let’s dive into making your own workout bench.Materials Needed
Gather your materials first. You’ll need plywood for the bench top. Use sturdy wood for the frame. Buy foam padding for comfort. Get upholstery fabric for covering. Have screws, nails, and brackets ready. Use a saw and drill for construction. Sandpaper will smooth edges. Collect measuring tape and pencil for marking.Step-by-step Construction
Start by measuring and cutting wood. Cut plywood for the bench top. Cut frame pieces to fit. Assemble the frame using screws. Attach brackets for stability. Secure the plywood on top. Ensure the bench is firm and stable. Sand all surfaces for smoothness. Check alignment frequently.Customizing For Comfort
Add foam padding to the bench. Ensure even distribution for comfort. Cover with upholstery fabric. Use a staple gun to secure fabric. Trim excess fabric neatly. Test bench for comfort. Adjust padding if necessary. Try different fabrics for style. Personalize with colors or patterns.Building A Pull-up Bar
Crafting a pull-up bar at home offers a cost-effective way to enhance your workout routine. With basic materials and tools, you can create sturdy equipment that fits your space. Boost your fitness journey by adding this versatile exercise tool to your home gym setup.
Building a pull-up bar in your home is a fantastic way to stay fit without splurging on expensive gym memberships or equipment. It allows you to work on your upper body strength and flexibility right in the comfort of your own space. With a little effort and creativity, you can construct a durable pull-up bar that meets your fitness needs. It’s not just about physical benefits; it’s about embracing the DIY spirit and enhancing your home workout setup. You may find that assembling your own pull-up bar becomes a rewarding project, adding a personal touch to your workout routine.Safety Considerations
Safety should be your top priority when building a pull-up bar. Ensure the bar is securely mounted to prevent accidents. Choose a sturdy location that can handle your weight, such as a doorway or a solid wall. Test the stability of the bar by gently applying pressure before using it for exercise. Consider the materials you use for the bar. Opt for high-quality metal or strong wood that can withstand repeated use. Regularly inspect the bar for any signs of wear or damage. If you notice any issues, address them immediately to avoid injury. Think about the space around the bar. Ensure there’s enough room for your movements without hitting anything. This not only protects you but also preserves the integrity of your surroundings.Installation Tips
Start by measuring the area where you plan to install the pull-up bar. This ensures a good fit and helps you avoid installation mishaps. Use a level tool to ensure the bar is straight and properly aligned. Gather all necessary tools and materials before beginning the installation. This keeps the process smooth and reduces interruptions. Follow clear, step-by-step instructions to avoid common installation mistakes. Once installed, test the pull-up bar’s strength by doing light exercises. This confirms its stability and ensures it can support your weight. If adjustments are needed, don’t hesitate to make them for your safety.Maintenance And Care
Routine maintenance is crucial for the longevity of your pull-up bar. Regularly clean the bar to remove sweat and dust, which can lead to corrosion. Use a damp cloth and mild detergent for cleaning. Check the mounting brackets and hardware for wear and tear. Tighten any loose screws or bolts to maintain the bar’s security. This keeps the bar safe and functional for your workouts. Consider adding grip tape to the bar for better hold and comfort during exercises. Replace worn-out tape to ensure a firm grip, reducing the risk of slipping. This simple addition can enhance your workout experience significantly. Building your own pull-up bar not only saves money but also provides a unique sense of accomplishment. What will your next DIY fitness project be?Diy Cardio Equipment
Creating your own cardio equipment at home can be fun and cost-effective. You don’t need fancy machines to get your heart pumping. With a little creativity, you can transform everyday items into workout tools. This not only saves money but also adds a personal touch to your fitness routine. Let’s explore some simple DIY cardio equipment ideas.
Jump Ropes From Household Items
Jump ropes offer a great cardio workout. But you don’t need to buy one. Use old clothesline or strong string. Measure it to fit your height. Tie knots at the ends to make handles. You can also use plastic bags. Twist and braid them tightly. Secure the ends with tape. These ropes are lightweight and easy to store. Jumping rope helps burn calories and improves coordination.
Building A Mini Stepper
A mini stepper provides a low-impact cardio workout. You can make one using old wood pieces. Cut two equal-sized boards for steps. Secure them with sturdy hinges. Use scrap wood for support. Place the stepper on a non-slip surface for safety. Paint it for a finished look. Stepping up and down strengthens your legs and boosts heart health. This is a simple and effective way to stay active at home.
Space Optimization Techniques
Creating a home gym in limited space requires smart planning. You need to make the most of every square inch. Choose the right equipment and storage solutions to keep your space tidy.
These techniques will help you fit everything you need into your home gym.
Multi-functional Equipment
Select equipment that serves multiple purposes. A resistance band can be used for strength training and stretching. Adjustable dumbbells replace several pairs of traditional weights. A pull-up bar can support various exercises like hanging leg raises.
Invest in a bench that can incline and decline. This allows for diverse workout positions. A yoga mat can be used for yoga, pilates, and core exercises.
Storage Solutions
Organize your equipment with clever storage solutions. Use wall-mounted racks for weights and bands. This keeps them off the floor and easy to reach. Install hooks for jump ropes and resistance bands.
Consider a storage bench or ottoman for smaller items like yoga blocks and mats. Use shelves or baskets for storing towels and water bottles. Foldable equipment like a treadmill can be stored away after use.
With these solutions, your home gym will stay neat and functional.

Credit: www.simplifiedbuilding.com
Incorporating Technology Into Diy Workouts
Technology has changed how we approach DIY workouts at home. With simple tools, you can enhance your fitness journey. Tracking your progress and finding guidance becomes easier. Integrating technology into workouts can make exercise more effective and engaging.
Tracking Progress With Apps
Fitness apps can help you track your workout progress. Use them to log exercises and monitor improvements. Many apps offer features like setting goals and reminders. Seeing your progress visually motivates you to continue. Some apps provide feedback on your performance. This helps in adjusting your workout routine.
Using Online Resources For Guidance
Online resources offer guidance for DIY workouts. Video tutorials show proper techniques and exercises. Websites have articles and tips on workout plans. Accessing expert advice online is convenient and cost-effective. Discussion forums allow you to share experiences with others. They offer support and ideas for new workouts.
Safety Tips For Diy Fitness Equipment
Creating your own home workout equipment is a fantastic way to stay fit without breaking the bank. But while it’s cost-effective and personalized, ensuring safety is paramount. Just like your favorite pair of sneakers, DIY fitness gear requires regular attention and care. Safety isn’t just about avoiding injuries—it’s about maximizing your workout efficiency and keeping your exercise routine stress-free. Let’s dive into some practical tips to help you keep your homemade equipment in top shape.
Regular Equipment Checks
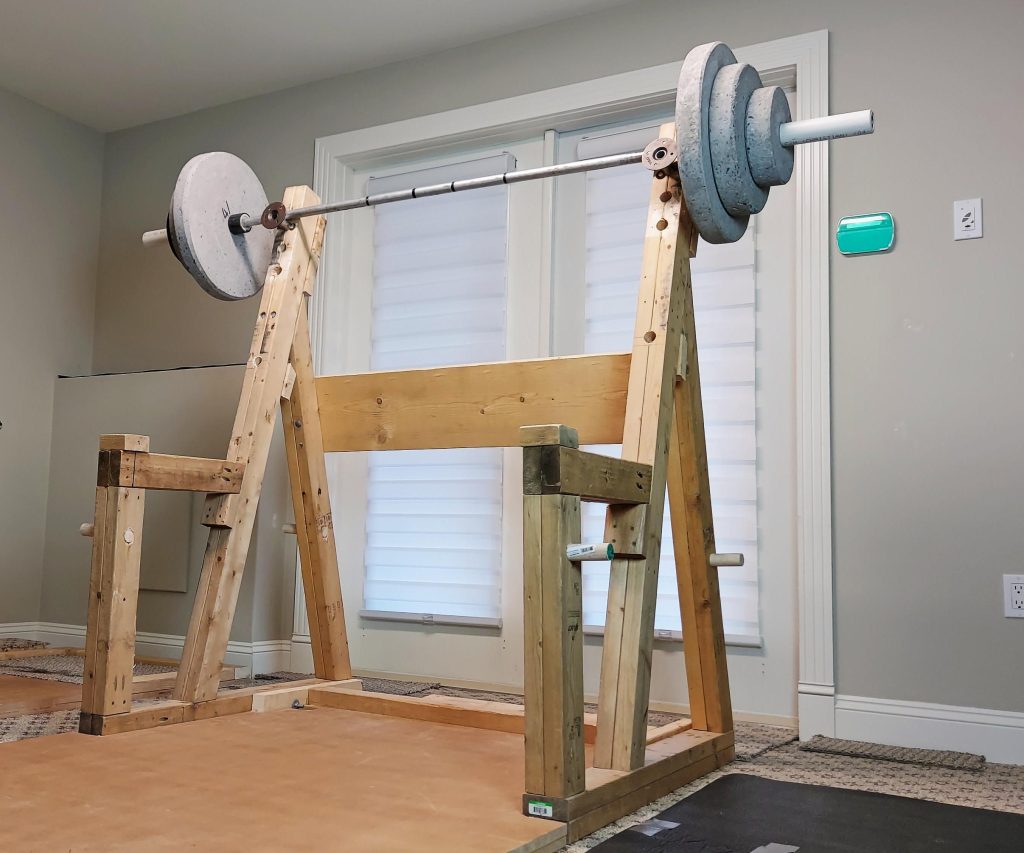
Think of your DIY equipment as a car that needs regular maintenance. Regularly inspect your gear for wear and tear. Check nuts, bolts, and any moving parts. Loose or damaged components can lead to accidents. Take it from my own experience—once, I found a loose screw on my homemade bench press, and fixing it promptly saved me from a potential mishap. Does your equipment feel sturdy? If not, it’s time for a tune-up.
Proper Usage Techniques
Knowing how to use your DIY equipment is crucial. Even the best-built gear can cause injury if misused. Make sure you understand the correct form and technique for each piece of equipment. For instance, a homemade kettlebell requires a firm grip and controlled movements to prevent slipping. Have you considered watching online tutorials for guidance? They can be a great resource to ensure you’re using your gear effectively and safely.
Remember, safety in your home gym is as essential as the workouts themselves. By regularly checking your DIY equipment and using it correctly, you can enjoy a safe and productive fitness journey. What steps will you take today to ensure your homemade gear is safe to use?

Credit: dailyburn.com
Frequently Asked Questions
How To Make Simple Gym Equipment At Home?
Use sturdy backpacks filled with books for weights. Create push-up bars with PVC pipes. Use a chair for tricep dips. Make a resistance band from old inner tubes. Use a towel for stretching exercises. These homemade gym equipment ideas are budget-friendly and effective for home workouts.
Which Equipment Is Best For Belly Fat?
Treadmills and elliptical machines are excellent for burning belly fat. Combine them with resistance training equipment like kettlebells and dumbbells. These tools help enhance metabolism and target belly fat effectively. Incorporate them into a balanced workout routine for optimal results.
What Is The Best Piece Of Exercise Equipment To Have At Home?
The best exercise equipment for home is a versatile set of dumbbells. They are compact, affordable, and suitable for various workouts. Investing in adjustable dumbbells offers even more flexibility, allowing for a range of exercises targeting different muscle groups. This choice supports strength training and overall fitness.
Is It Cheaper To Build Your Own Gym?
Building your own gym can be cheaper. Initial costs vary based on equipment quality and quantity. Savings accumulate over time by avoiding membership fees. Carefully selecting essential equipment helps minimize expenses. Personalizing equipment choices offers long-term cost benefits, making it a potentially economical option.
Conclusion
Creating DIY home workout equipment is simple and cost-effective. You can use household items to stay fit. This approach saves money and space. Plus, it encourages creativity in your routine. Start with basic equipment. Gradually add more as you get comfortable.
Remember, consistency is key to seeing results. Safety should always come first. Check your equipment regularly for wear and tear. Working out at home can be fun and rewarding. Enjoy the process and stay motivated. Your fitness journey is unique.
Make it enjoyable and sustainable. Happy exercising at home!